If your dog has a coat that’s looking a bit dull or stained, you might want to consider making your own DIY dog whitening shampoo. This is a simple and effective way to brighten up your furry friend's fur while using natural ingredients that are safe for their skin. Not only can you save money compared to store-bought options, but you also have control over what goes into the shampoo. In this guide, we’ll walk you through the benefits, ingredients, and steps to create a whitening shampoo that will leave your dog’s coat looking fresh and vibrant.
Key Takeaways
- DIY dog whitening shampoo is made from safe, natural ingredients.
- Ingredients like baking soda and hydrogen peroxide can help remove stains.
- Making your own shampoo can be more cost-effective than buying commercial products.
- Proper application and rinsing techniques are crucial for best results.
- Regular grooming and a good diet contribute to maintaining a bright coat.
Understanding The Benefits Of DIY Dog Whitening Shampoo
Natural Ingredients For A Healthier Coat
One of the best things about making your own dog shampoo is knowing exactly what's going into it. Commercial shampoos can sometimes have harsh stuff that might irritate your dog's skin, but when you DIY, you get to pick gentle, natural stuff. This can make a big difference, especially if your dog has sensitive skin or allergies. You can choose ingredients that not only whiten but also nourish their coat, leaving it soft and healthy.
Cost-Effective Solutions
Let's be real, buying fancy dog shampoo all the time can get expensive. Making your own whitening shampoo is way cheaper in the long run. You probably already have some of the ingredients at home, like baking soda or hydrogen peroxide. Plus, you can make a big batch that lasts a while, saving you even more money. It's a win-win for your dog's coat and your wallet.
Avoiding Harmful Chemicals
Ever read the label on a bottle of dog shampoo and see a bunch of ingredients you can't even pronounce? Some of those chemicals can be pretty harsh and might even cause skin problems for your furry friend. When you make your own shampoo, you get to skip all that questionable stuff.
You're in control of what goes on your dog's skin, which means you can avoid potential irritants and keep their coat healthy and bright without any nasty side effects.
Essential Ingredients For Your DIY Dog Whitening Shampoo
Making your own dog whitening shampoo means you get to control exactly what goes into it. That's a big win! You can pick ingredients that are not only effective but also gentle on your dog's skin. Let's look at some key ingredients you might want to include.
Baking Soda For Stain Removal
Baking soda is a fantastic, natural ingredient for removing stains. It works by gently lifting discoloration from the fur. It's also great at neutralizing odors, which is a bonus after a muddy romp in the park. When using baking soda, it's important to use it in moderation to avoid drying out your dog's skin. A little goes a long way!
Hydrogen Peroxide As A Brightener
Hydrogen peroxide can act as a brightening agent, but it needs to be used with caution.
It's important to dilute hydrogen peroxide properly. A 3% solution is generally considered safe when diluted further with water. Never use a higher concentration, as it can irritate your dog's skin and cause damage to their coat.
Here's a quick guide:
- Use a 3% solution.
- Dilute it with water (1 part hydrogen peroxide to 5 parts water).
- Avoid contact with eyes and mouth.
Natural Oils For Moisture
To counteract any potential drying effects from the stain-removing ingredients, adding natural oils is a great idea. Oils like coconut oil, olive oil, or even almond oil can help keep your dog's coat moisturized and shiny. These oils not only add moisture but also provide a protective barrier, keeping the skin healthy. Plus, they can make your DIY shampoo smell amazing! Here are some benefits:
- Adds moisture to the coat.
- Provides a protective barrier on the skin.
- Can improve coat shine and manageability.
Step-By-Step Guide To Making Your Own Shampoo
Gathering Your Supplies
Okay, so you're ready to make some dog shampoo! First, you gotta get everything together. It's way easier if you have all your ingredients and tools ready to go before you start mixing. Here's a list to get you started:
- Baking soda
- Hydrogen peroxide (3% solution)
- Mild dish soap (make sure it's safe for pets!)
- Glycerin or olive oil (for moisture)
- Essential oil (optional, for scent – lavender or chamomile are good choices)
- A mixing bowl
- A measuring cup and spoons
- A storage container (an old shampoo bottle works great!)
Having all this stuff on hand will make the whole process way smoother. Trust me, you don't want to be running around looking for a measuring spoon when you're halfway through mixing everything.
Mixing The Ingredients
Alright, now for the fun part! Let's get this shampoo mixed up. Here’s a simple recipe you can try:
- In your mixing bowl, add 1/2 cup of baking soda.
- Pour in 1/4 cup of hydrogen peroxide. Be careful, it can bubble up a bit!
- Add 1/4 cup of mild dish soap. Again, make sure it's safe for your dog.
- Stir in 1 tablespoon of glycerin or olive oil. This will help keep your dog's skin from drying out.
- If you're using essential oils, add only 2-3 drops. Remember, less is more when it comes to essential oils and pets.
- Mix everything together until it's well combined. There shouldn't be any clumps of baking soda.
Make sure you're mixing in a well-ventilated area, especially when using hydrogen peroxide. And always avoid getting the shampoo in your dog's eyes.
Storing Your Shampoo
So, you've made your shampoo – awesome! Now, where do you put it? The best way to store your DIY dog shampoo is in an airtight container. An old shampoo bottle that's been thoroughly cleaned works great. Just make sure to label it clearly so you don't accidentally use it on yourself! Store it in a cool, dark place. This will help keep the ingredients stable. Your shampoo should last for about 2-3 weeks. If it starts to look or smell weird, it's time to make a fresh batch.
How To Use Your DIY Dog Whitening Shampoo
Preparing Your Dog For Bath Time
Okay, so you've got your DIY whitening shampoo ready to go. Now what? First, make sure you've got everything you need within reach. I'm talking towels, a good brush, and maybe even some treats to keep your dog happy. Brush your dog thoroughly before the bath to get rid of any loose fur and mats. This makes the shampooing process way easier and more effective. Also, make sure the water is lukewarm – not too hot, not too cold. You want your dog to be comfortable, not stressed out. A calm dog is a cooperative dog!
Application Techniques
Alright, time to get your dog wet. Start by wetting their coat thoroughly with lukewarm water. Then, grab your DIY whitening shampoo and start applying it. I usually start at the neck and work my way down, making sure to get every part of their body. Gently massage the shampoo into their coat, working it into a good lather. Pay special attention to any stained areas, but be careful around their eyes and ears. You don't want to get shampoo in those sensitive spots. Let the shampoo sit for about 5-10 minutes to really let it do its thing. This gives the whitening ingredients time to work on those stains.
Rinsing And Drying
Rinsing is super important. You want to make sure you get all the shampoo out of your dog's coat. Leftover shampoo can cause skin irritation, and nobody wants that. Rinse until the water runs clear. Seriously, keep rinsing. Once you're sure all the shampoo is gone, it's time to dry your dog. I like to start with a towel to get rid of most of the water. Then, if your dog isn't scared of them, you can use a blow dryer on a low, cool setting. Make sure to keep the dryer moving to avoid overheating any one spot. And that's it! You've successfully used your DIY dog whitening shampoo. Your dog should be looking brighter and feeling fresh.
After the bath, give your dog lots of praise and maybe a treat or two. This helps them associate bath time with positive experiences, making it easier next time. Plus, who doesn't love a happy, clean dog?
Tips For Maintaining A Bright Coat
Regular Grooming Practices
Regular grooming is super important for keeping your dog's coat bright and healthy. Think of it like this: brushing isn't just about making your dog look good; it's also about getting rid of loose fur, dirt, and debris that can make their coat look dull. Aim to brush your dog several times a week, or even daily if they have a long or thick coat. This helps distribute natural oils, which keeps their fur shiny and prevents mats. For breeds prone to staining, like Maltese or Poodles, daily face washing can prevent tear stains from setting in.
Dietary Considerations
What your dog eats plays a big role in how their coat looks. A balanced diet full of the right nutrients is key for a healthy, bright coat. Make sure their food has enough omega-3 and omega-6 fatty acids, which are great for skin and fur health. You can also add supplements like fish oil to their diet, but it's always a good idea to talk to your vet first. A diet lacking in essential nutrients can lead to a dull, brittle coat that's more prone to staining.
Hydration And Skin Health
Keeping your dog hydrated is just as important as feeding them the right food. Water helps keep their skin moisturized, which in turn keeps their coat healthy and bright. Make sure your dog always has access to fresh, clean water. Also, pay attention to their skin. Dry, itchy skin can lead to excessive scratching, which can damage their coat. If you notice any skin issues, talk to your vet. Sometimes, a special shampoo or dietary change can make a big difference.
Maintaining a bright coat involves a combination of regular grooming, a balanced diet, and proper hydration. Addressing these areas will not only enhance your dog's appearance but also contribute to their overall health and well-being. Remember, a healthy dog is a happy dog, and a bright coat is often a sign of good health.
Common Mistakes To Avoid When Making Shampoo
Making your own dog shampoo can be a rewarding experience, but it's easy to slip up if you're not careful. I've made a few blunders myself, so I can tell you firsthand what to watch out for. Here's the lowdown on common mistakes and how to dodge them.
Using Too Much Hydrogen Peroxide
Okay, so hydrogen peroxide is like, the go-to for whitening, right? But here's the thing: too much can seriously irritate your dog's skin. It's a strong chemical, and their skin is way more sensitive than ours. I learned this the hard way when I tried to get extra bright results and ended up with a very itchy pup. Stick to the recommended amount, and if you're unsure, always go for less. You can always reapply, but you can't undo irritation!
Neglecting Skin Sensitivities
Every dog is different. What works for my friend's golden retriever might not work for my little terrier. Some dogs have allergies or skin conditions that make them extra sensitive to certain ingredients. Before you slather your dog in a new shampoo, do a little patch test. Apply a small amount to a small area and wait 24 hours to see if there's any reaction. Trust me, it's better to be safe than sorry. I once used a shampoo with oatmeal, thinking it would be gentle, but my dog turned out to be allergic! It was a mess.
Improper Storage Methods
So, you've made your awesome DIY shampoo. Now what? Don't just leave it sitting in the shower! Proper storage is key to keeping it fresh and effective. Here's what I do:
- Use an airtight container.
- Store it in a cool, dark place.
- Label it with the date you made it.
I once left a batch of shampoo in a clear container on the windowsill. The sunlight totally messed with the ingredients, and it went bad way faster than it should have. Now I'm super careful about where I keep it.
Alternative Whitening Solutions For Dogs
Sometimes, despite our best efforts with DIY solutions, we might need to explore other options for keeping our dogs looking their brightest. Luckily, there are several alternatives available, ranging from commercial products to professional grooming and even some simple home remedies.
Commercial Whitening Products
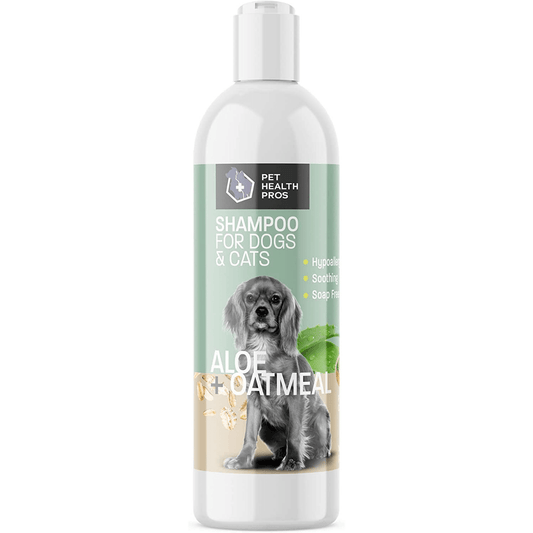
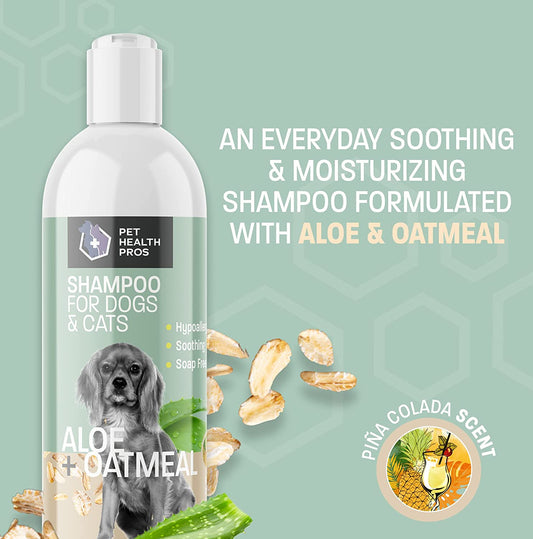
If you're not into making your own shampoo, there are tons of commercial whitening shampoos and products you can buy. These are formulated to brighten your dog's coat, but it's super important to read the labels carefully. Look for products made with gentle ingredients and avoid anything with harsh chemicals or artificial dyes. Always check reviews and maybe even ask your vet for recommendations before trying something new.
Professional Grooming Services
Taking your dog to a professional groomer can be a great option, especially if you're dealing with stubborn stains or just want a really thorough cleaning. Groomers have access to specialized equipment and products, and they know how to use them safely and effectively. Plus, they can give your dog a full makeover, including nail trims, ear cleaning, and even breed-specific haircuts. It's a bit pricier than DIY, but the results can be worth it.
Home Remedies
If you're looking for gentler ways to brighten your dog's coat without using harsh chemicals, there are a few home remedies you could try.
Here are some ideas:
- Lemon Rinse: Dilute lemon juice with water and use it as a final rinse after shampooing. Be careful to avoid your dog's eyes and any open wounds, as lemon juice can sting.
- Chamomile Tea: Brew a strong chamomile tea, let it cool, and use it as a rinse. Chamomile has mild brightening properties and can also soothe irritated skin.
- Apple Cider Vinegar: Dilute apple cider vinegar with water and use it as a rinse. ACV can help balance your dog's skin pH and remove buildup that can dull their coat.
Remember to always do a patch test before applying any new product or remedy to your dog's entire coat. This will help you check for any allergic reactions or sensitivities. And if you're ever unsure about something, it's always best to consult with your vet or a professional groomer.
If you're looking for ways to brighten your dog's smile without harsh chemicals, there are some great options out there! Natural remedies like coconut oil or baking soda can help keep your pup's teeth clean and white. You can also find special dog-friendly toothpaste that works wonders. For more tips and products to help your furry friend shine, visit our website today!
Final Thoughts on DIY Dog Whitening Shampoo
Making your own dog whitening shampoo can be a fun and rewarding project. Not only do you get to customize the ingredients to suit your dog's needs, but you also save some cash compared to store-bought options. Plus, it’s a great way to bond with your furry friend while keeping them looking their best. Just remember to do a patch test before applying any new product to your dog's coat, and always consult your vet if you have any concerns. With a little effort, you can help your pup shine bright and feel fresh!
Frequently Asked Questions
What is DIY dog whitening shampoo?
DIY dog whitening shampoo is a homemade cleaning product designed to brighten your dog's coat using simple ingredients.
Can I use regular shampoo on my dog?
No, regular human shampoos can irritate a dog's skin. It's best to use products made specifically for dogs.
How often can I use whitening shampoo on my dog?
You should use whitening shampoo only once a month to avoid drying out your dog's coat.
Is it safe to use hydrogen peroxide in dog shampoo?
Yes, but it should be diluted properly. Too much can irritate your dog's skin.
What if my dog has sensitive skin?
If your dog has sensitive skin, test the shampoo on a small area first, and consider using gentler ingredients.
Are there alternatives to commercial whitening shampoos?
Yes, you can use natural ingredients like baking soda, lemon juice, and vinegar as alternatives.

